Forms to Emails using AWS Lambda + API Gateway + SES
When deploying static websites, I am not a fan of provisioning servers to distribute them. There are so many alternatives that are cheaper, simpler, and faster than managing a full backend server: S3 buckets, Content-Delivery Networks (CDNs), etc. But the catch with getting rid of a server is now you don’t have a server anymore! Without a server, where are you going to submit forms to? Lucky for us, in a post-cloud world, we can solve this!
In this post, I will describe how AWS Lambda and API Gateway can be used as a “serverless” backend to a fully static website that can submit forms that get sent as emails to the site owner.
Important Note*
This is merely a demonstration. For simplicity, I do not explain important things like setting up HTTPS in API Gateway but I certainly recommend it. Also, be careful applying this solution to other contexts. Not all data can/should be treated like publicly submittable contact form data. Most applications will require more robust solutions with authentication and data stores. Be wise, what can I say more.
Prerequisites
- AWS Account
The project is a simple static marketing website. Like most business websites, it has a “Contact Us” page with a form that potential customers can fill out with their details and questions. In this situation, we want this data to be emailed to the business so they can follow-up. This means we need an endpoint to (1) receive data from this form and (2) send an email with the form contents.
Let’s start with the form:
|
|
And because API Gateway is annoying to use with application/x-www-form-urlencoded data, we’re just going to us jQuery to grab all the form data and submit it as JSON because it will Just Work™:
|
|
Handling the success and error cases are left as an exercise to the reader :)
Lambda Function
Now lets get to the Lambda Function! Open up the AWS Console and navigate to the Lambda page and choose “Get Started Now” or “Create Function”:
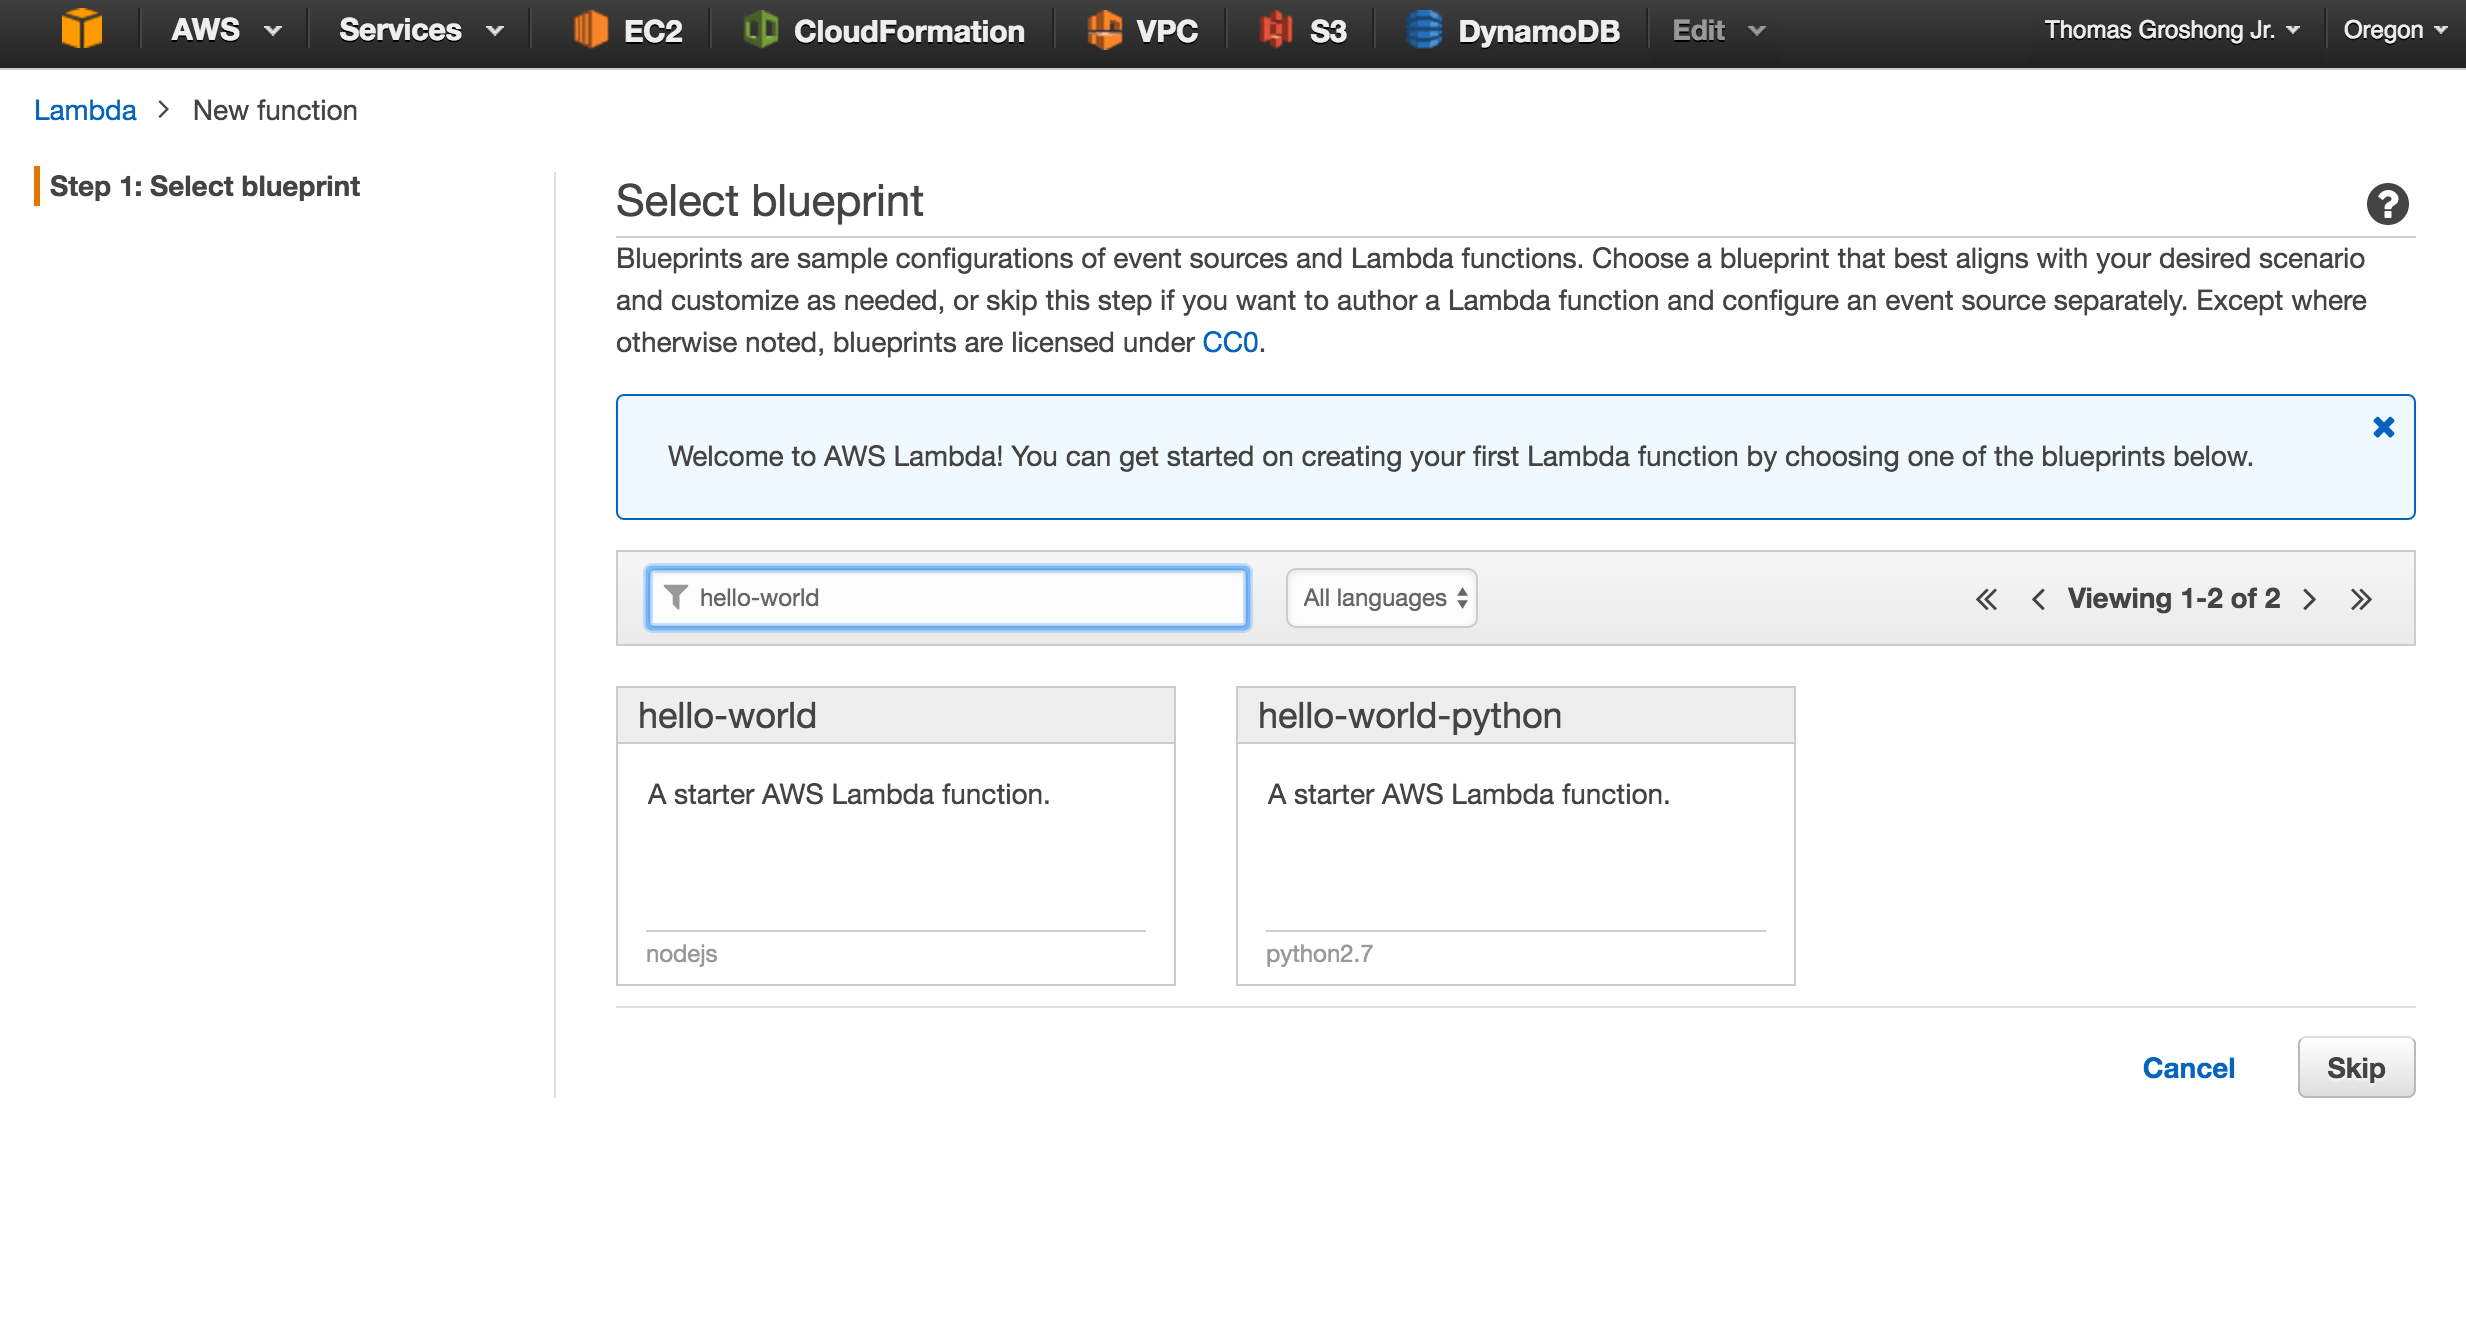
On the “Select Blueprint” page, search for the “hello-world” blueprint for Node.js (not python):
Now, you create your function. Choose the “Edit Code Inline” setting which will have a big editor box with some JavaScript code in it and replace that code with the following:
|
|
Replace the placeholders for RECEIVER and SENDER with real email addresses.
Give it a name and take the defaults for all the other settings except for Role* which is where we specify an IAM Role with the permissions the function will need to operate (logs and email sending). Select that and Basic execution role which should pop-up with an IAM role dialog. Take the defaults but open the “View Policy Document” and choose “Edit”. Change the value to the following:
|
|
The first statement allows you to write logs to CloudWatch. The second statement lets you use the SES SendEmail API. With the IAM Role added, we will move to setting up the API Gateway so our Lambda function will be invoked by POST’s to an endpoint.
API Gateway Setup
The process for configuring API Gateway is as follows:
- Create an API
- Create a “Contact” resource
- Create a “POST” method that invokes our Lambda Function
- Enable CORS on our resource
Open up the API Gateway in the Console:
Select the “Get Started” or “Create API” button. Give the API a useful name and continue.
Now we will create a “Resource” and some “Methods” for our API. I will not walk you through each step of the process because the GUI is a little tricky to explain, but the process is fairly straightforward.
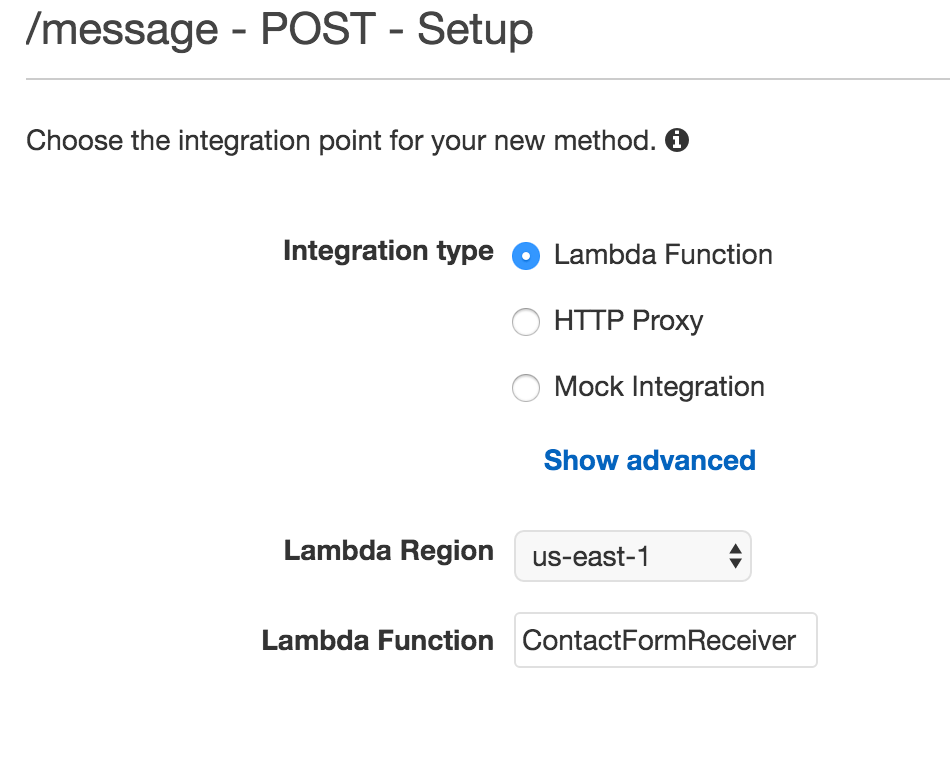
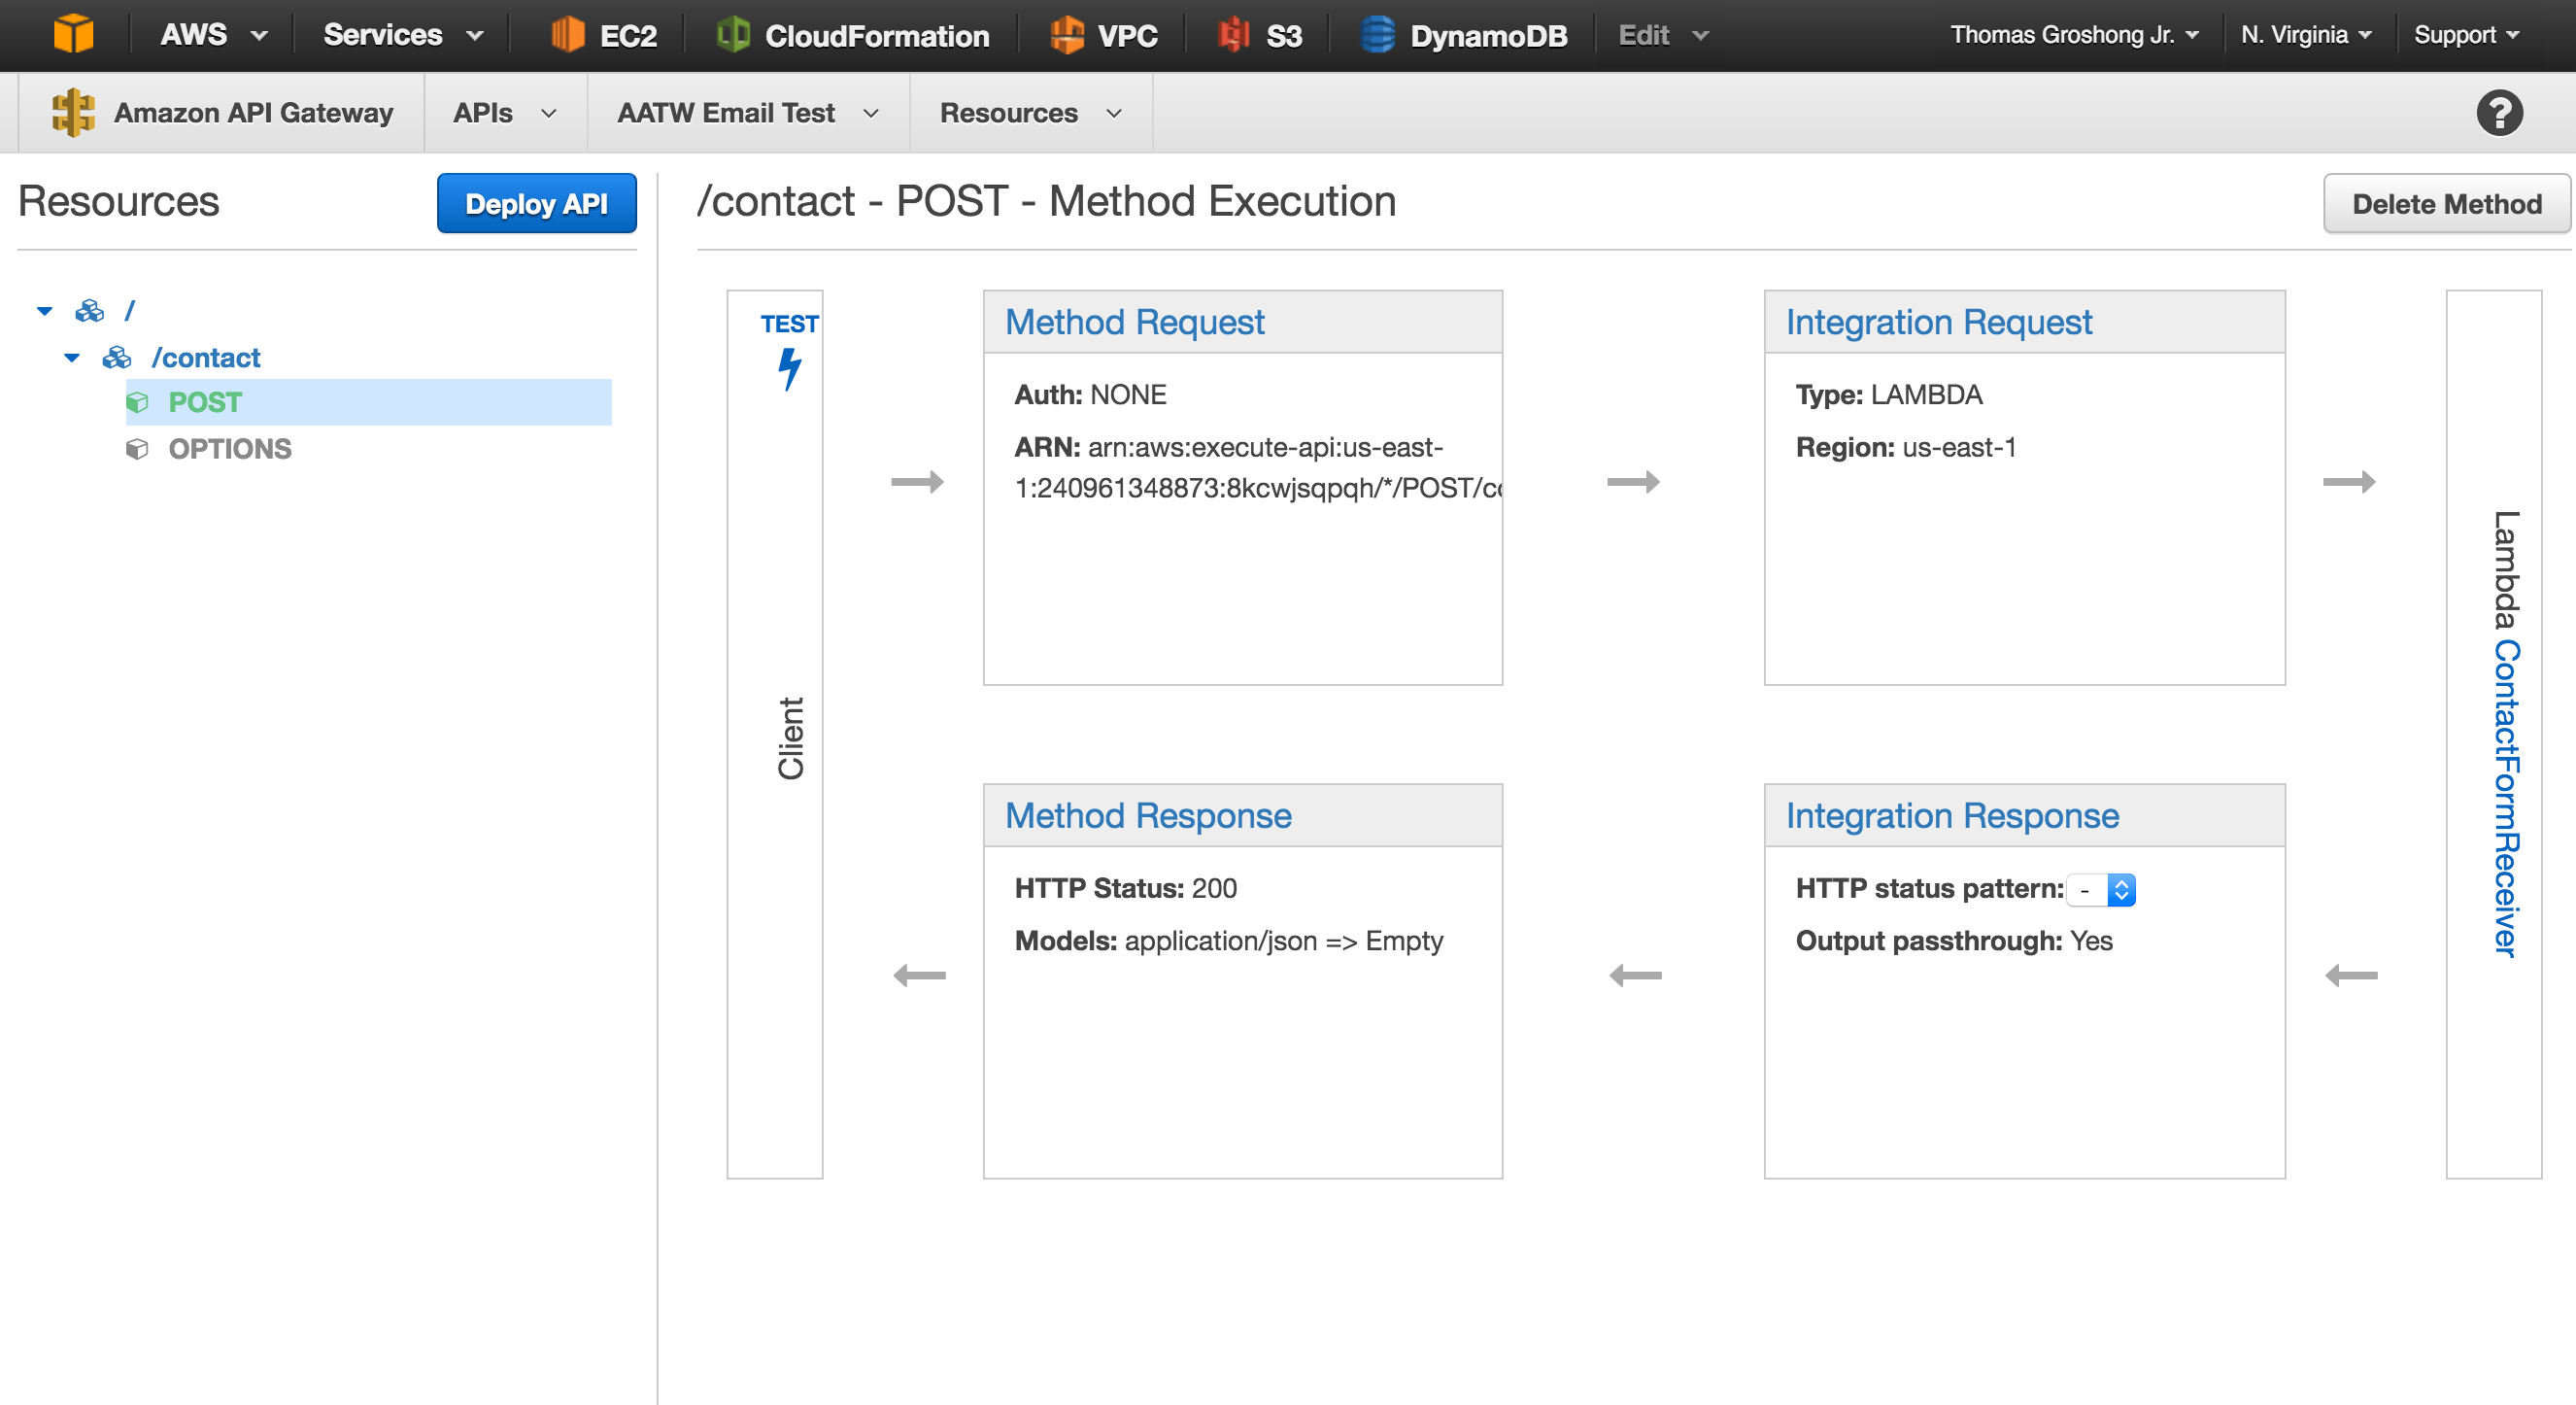
Using the “Actions” dropdown, “Create Resource” name it something like “Contact” or “Message”. Then, with the resource selected, use “Actions” to “Create Method”. Choose a POST. Now we will connect it to our Lambda Function:
Once you save this, you will need to Enable CORS so that your code in the browser can POST to this other Domain. Choose your resource > Actions > Enable CORS.
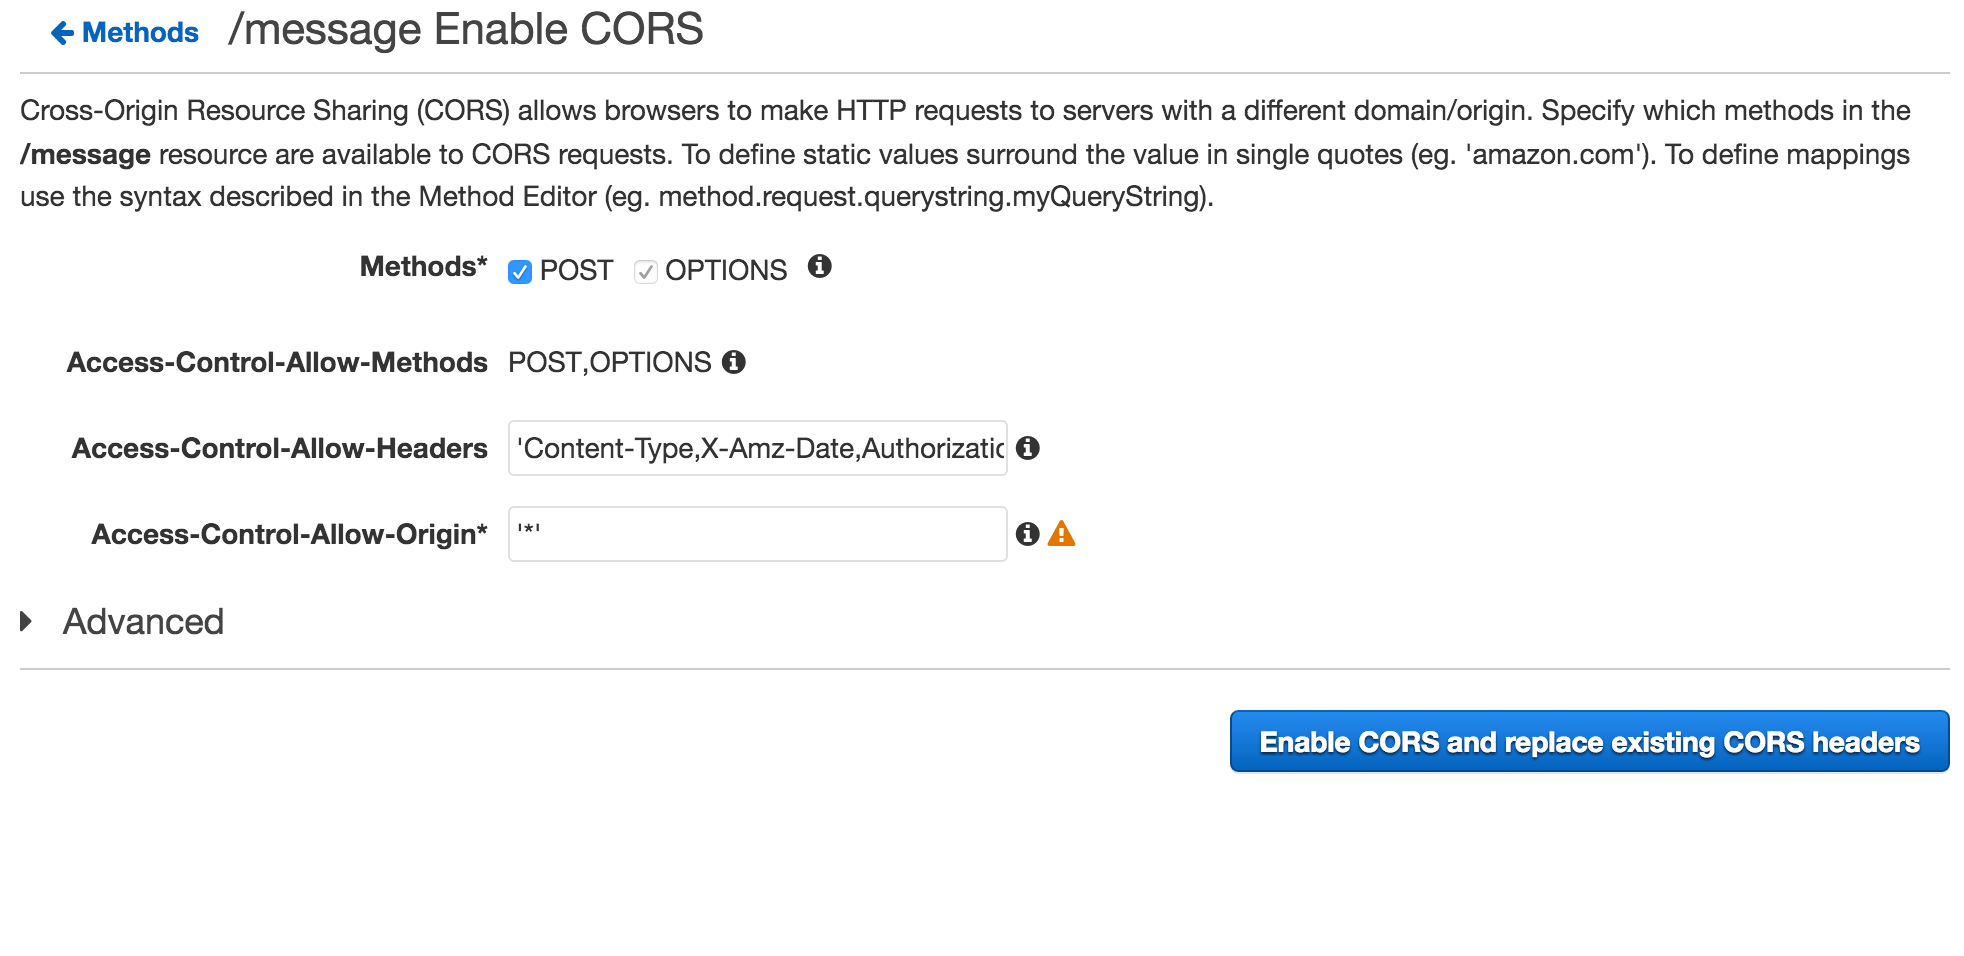
Just to be safe, I added a header to Access-Control-Allow-Headers that I believe jQuery sends on AJAX calls. Just put this at the end of the comma-separated list: x-requested-with. I am also using the ‘*’ so that it is easy for local testing. For Production, you should add the actual domain name you will be running your website under.
Now your resources and methods should look something like this:
The last step is to “Deploy API”. It’s not too bad. Just click through the screens and fill them out with stuff that makes sense to you. The high-level overview is that you need to create a “Stage” and then whenever you make updates to your API, you “deploy” to a “stage”. This means that you can deploy the same API to multiple stages and test out any changes on a “Testing” stage and if things are good, deploy to the “Production” stage.
At the end of “deploying”, they will give you an “Invoke URL”. This URL is the root of your API. To make requests to a resource just add the name to the end of the URL: “https://invoke-url/stage-name/resource”. To POST to our “Contact” (or “Message”) resource and given an Invoke URL of https://1111111.magic.amazonaws.com/testing, you will make POST requests to https://1111111.magic.amazonaws.com/testing/contact. Put this URL into the jQuery code as the value of var URL.
SES + Email Validation
We are using SES to send emails. For testing, it restricts the email addresses that can “send” and “receive” messages to ones that have been “verified”. It is very simple. Just go to the SES page of the Console, choose Email Addresses > Verify New Email Address. Do this for each email address you would like to “send as” and “send to”.
Try it Out
This should get you most of the way. If everything worked out, you should be able to submit your contact form and then receive an email with contents.
Post questions in the comments if you hit any problems. This is only a summary and pare down of the process I went through. Update
Jeff Richards (http://www.jrichards.ca/) recommended an all-in-one HTML + JavaScript snippet. Here is a Github Gist of that snippet: https://gist.github.com/tgroshon/04b94aee6331bb65f05f4e0d7ff2e8bd